Navigating the world of server-side JavaScript development often leads you to Node.js, a powerful runtime environment. If you’re working with Amazon Linux, getting Node.js up and running is a crucial first step. This guide provides a comprehensive walkthrough on how to yum install Node.js on your Amazon Linux instance, equipping you with the knowledge to start building dynamic and scalable web applications. We’ll cover best practices, troubleshooting tips, and additional resources to ensure a smooth installation process.
Preparing Your Amazon Linux Instance
Before diving into the installation, it’s essential to prepare your Amazon Linux instance. This ensures a clean and efficient installation process. First, update the system’s package list using the command sudo yum update -y. This refreshes the repository information and brings your system up-to-date with the latest available packages. This minimizes potential conflicts and ensures you’re installing the most recent version of Node.js. Secondly, consider installing the “Development Tools” group. This group includes essential utilities like gcc and make, which are often required when compiling native Node.js modules.
Installing Node.js via YUM
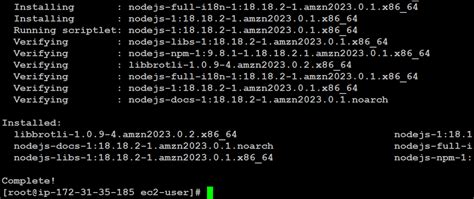
Amazon Linux simplifies the Node.js installation process through its package manager, yum. Using yum offers a straightforward way to install and manage different versions of Node.js. The command sudo yum install nodejs installs the latest Long Term Support (LTS) version recommended for most users due to its stability and extended support cycle. For specific versions, utilize the Amazon Linux Extras Library. Enable the desired Node.js version with a command like sudo amazon-linux-extras enable nodejs16 (replace ‘16’ with your target version). Then proceed with sudo yum install nodejs. This approach provides greater control over the Node.js version deployed on your system.
Verifying the Installation
After installation, it’s crucial to confirm that Node.js and npm (Node Package Manager) are correctly installed and functioning. Run node -v and npm -v in your terminal. These commands display the installed versions of Node.js and npm, respectively. Successful output confirms a correct installation. If you encounter issues, double-check the previous steps, ensuring the correct repository is enabled and the installation completed without errors. Troubleshooting resources, like the official Node.js documentation or community forums, can provide assistance if needed.
Managing Node.js Versions with NVM (Optional)
For developers working with multiple Node.js projects, each potentially requiring a different Node.js version, the Node Version Manager (NVM) is a valuable tool. NVM allows seamless switching between different Node.js versions on the same machine, preventing version conflicts and streamlining development workflows. While NVM isn’t directly installed via yum, its flexibility makes it a worthwhile consideration for managing multiple Node.js environments on your Amazon Linux instance. Learn more about optimizing your development environment.
- Always update your system packages before installing Node.js.
- Use node -v and npm -v to confirm successful installation.
Best Practices and Troubleshooting
Sticking to best practices ensures a smooth and efficient Node.js experience. Regularly updating Node.js to the latest LTS version ensures you benefit from performance improvements, security patches, and new features. Leverage npm effectively for managing project dependencies, ensuring consistent and reproducible builds. When troubleshooting, consult the official Node.js documentation and community forums, which offer extensive resources and support.
- Update your system’s package list.
- Install the chosen Node.js version.
- Verify the installation.
- Regularly update Node.js to the latest LTS version.
- Utilize npm for managing project dependencies.
Featured Snippet: To quickly check your Node.js version after installation, simply open your terminal and type node -v. This command will instantly display the installed version, confirming the success of your installation process.
[Infographic Placeholder: Visual guide showcasing the steps to install Node.js on Amazon Linux]
Common Errors and Solutions
Encountering errors during installation is normal. Common issues include network connectivity problems, incorrect repository configuration, or dependency conflicts. Systematically checking these areas often resolves the problem. Online forums and the Node.js documentation are valuable resources for troubleshooting specific errors.
FAQ
Q: What is the difference between Node.js and npm?
A: Node.js is the runtime environment, while npm (Node Package Manager) is a tool for managing packages and dependencies used in Node.js projects.
Q: How do I update Node.js to the latest version?
A: You can update Node.js by reinstalling it using the yum method described earlier, making sure to enable the desired version from Amazon Linux Extras. Alternatively, consider using NVM for managing multiple Node.js versions.
By following the steps outlined in this guide, you’ll have Node.js and npm successfully installed on your Amazon Linux instance. This foundation allows you to delve into building robust and scalable web applications. Explore the rich ecosystem of npm packages, leverage the power of server-side JavaScript, and stay updated with the latest advancements in the Node.js world to maximize your development potential. Check out these resources for further learning: Official Node.js Documentation, Adding Repositories in Amazon Linux, and NVM GitHub Repository.
Question & Answer :
I’ve seen the write-up on using yum to install the dependencies, and then installing Node.js and NPM from source. While this does work, I feel like Node.js and NPM should both be in a public repository somewhere.
How can I install Node.js and NPM in one command on AWS Amazon Linux?
I stumbled onto this, and it was strangely hard to find again later. I am putting it here for posterity:
sudo yum install nodejs npm --enablerepo=epel
As of July 2016, EDIT 1 no longer works for Node.js 4 (and EDIT 2 neither). This answer (https://stackoverflow.com/a/35165401/78935) gives a true one-liner.
EDIT 1: If you’re looking for Node.js 4, please try the EPEL testing repository:
sudo yum install nodejs --enablerepo=epel-testing
EDIT 2: To upgrade from Node.js 0.12 installed through the EPEL repository using the command above, to Node.js 4 from the EPEL testing repository, please follow these steps:
sudo yum rm nodejs sudo rm -f /usr/local/bin/node sudo yum install nodejs --enablerepo=epel-testing
The newer packages put the node binaries in /usr/bin, instead of /usr/local/bin.
And some background:
The option --enablerepo=epel causes yum to search for the packages in the EPEL repository.
EPEL (Extra Packages for Enterprise Linux) is open source and free community based repository project from Fedora team which provides 100% high quality add-on software packages for Linux distribution including RHEL (Red Hat Enterprise Linux), CentOS, and Scientific Linux. Epel project is not a part of RHEL/Cent OS but it is designed for major Linux distributions by providing lots of open source packages like networking, sys admin, programming, monitoring and so on. Most of the epel packages are maintained by Fedora repo.
Via http://www.tecmint.com/how-to-enable-epel-repository-for-rhel-centos-6-5/
